

How To Make Your Own Simple Leather Key Fob (Free Template)
When you’re a beginner in leatherworking you are always looking for simple leather crafts to help you hone your basic skills. This is a great project, using minimal tools, and you end up with a useful, everyday use item!
Using the templates included, I’ll show you step by step how to make a regular leather key chain, as well as a belt loop key fob. Let’s get started!
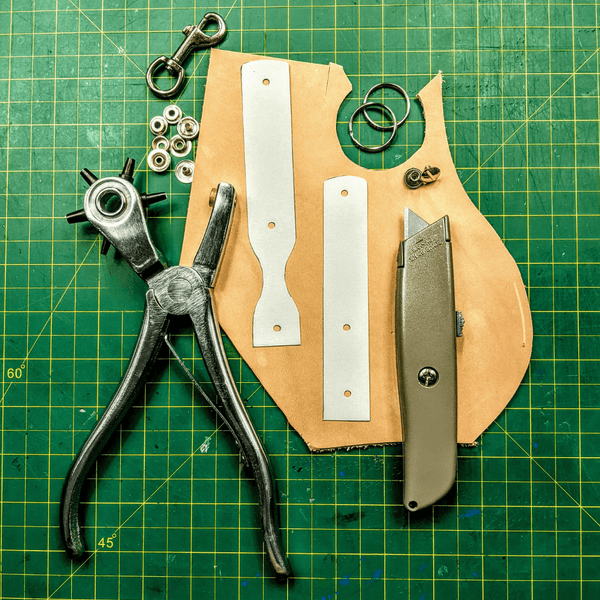
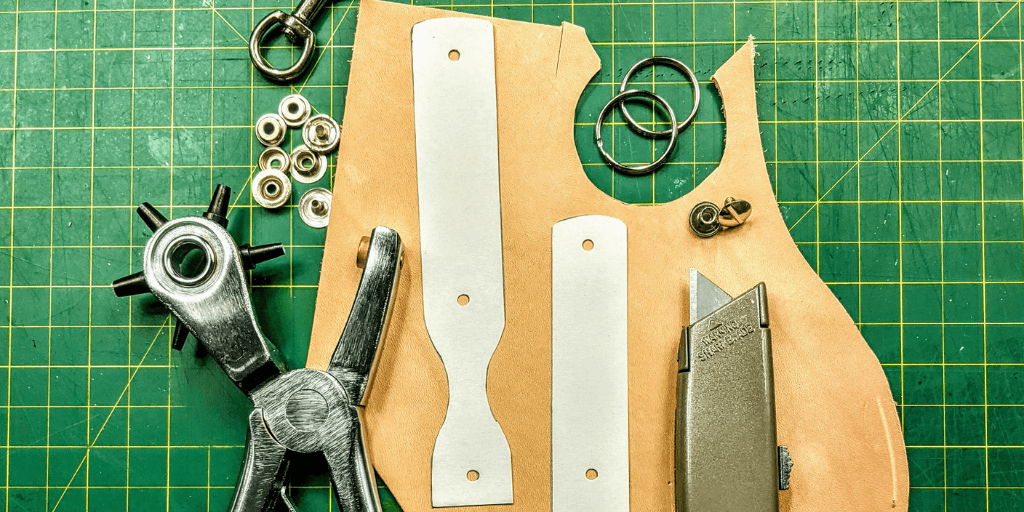
Tools Needed For Key Fob:
Leather (I used 3-4 oz Vegetable Tan, but Oil Tan would work nicely as well)
Key Fob Template (click here to download, print at "Actual Size" or 100%)
Knife/Blade
1” Split Ring
Chicago Screws or Rivets
Tools Needed For Belt Loop Key Fob:
Leather (I used 3-4 oz Vegetable Tan, but Oil Tan would work nicely as well)
Key Fob Template (click here to download, print at "Actual Size" or 100%)
Knife/Blade
Swivel Snap (¾” Eye)
1” Split Ring (Optional)
To start, print out the free key fob template we’ve included in the tool list (or here if you don’t want to scroll back up). I recommend printing it on thick stock paper if possible. It helps the template stand up to multiple uses and makes it easier to cut or trace around.
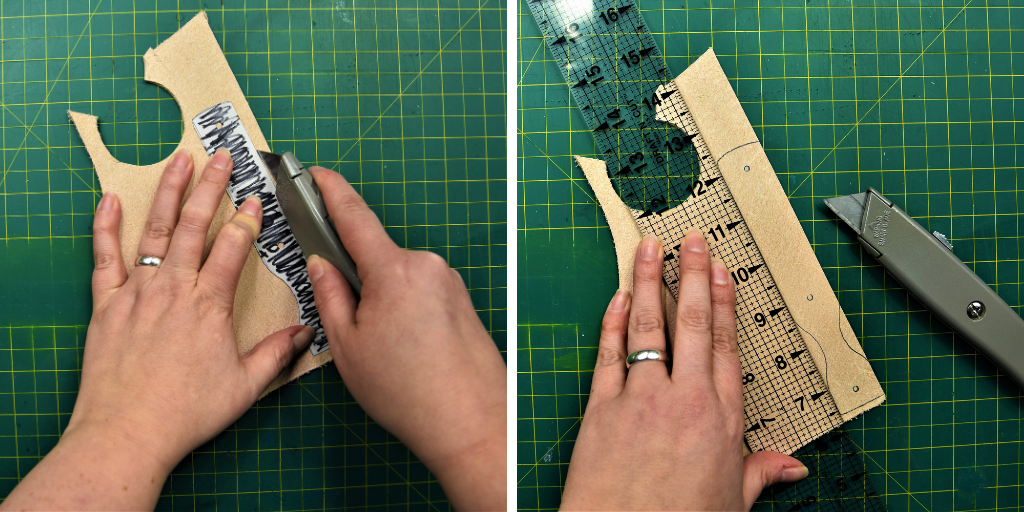
Take your template, and lay it out on your leather. Try to keep close to the sides so you can get as many cuts out of the piece of leather as possible.
Cut around the template using your knife. Or using a pencil, scratch awl, or pen, trace the template onto your leather and make your cuts with a knife and a straight edge ruler.
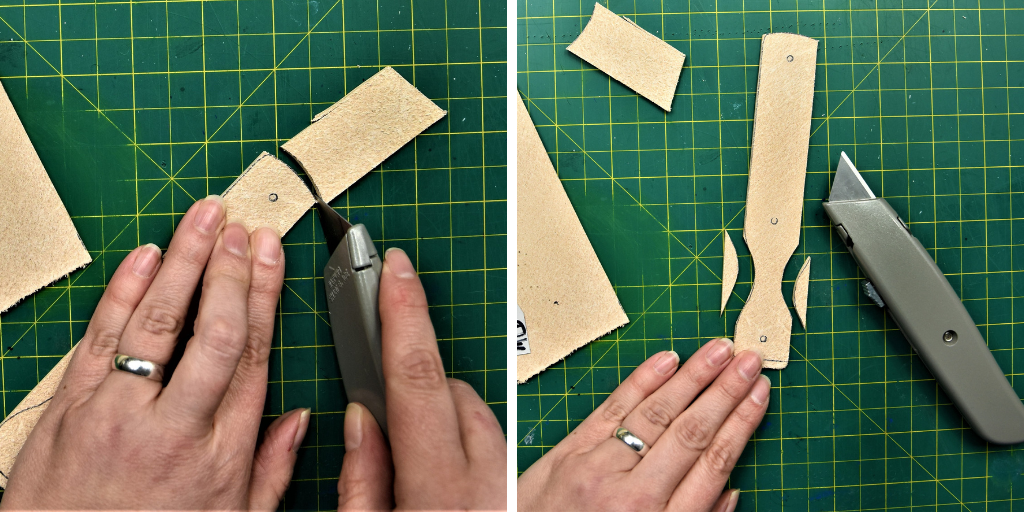
With as steady a hand as you can muster, slowly and steadily cut your rounded edges. With practice, it does get easier to free hand cut curves and shapes. Test these curves on some scrap leather to get a feel for how to move your knife.
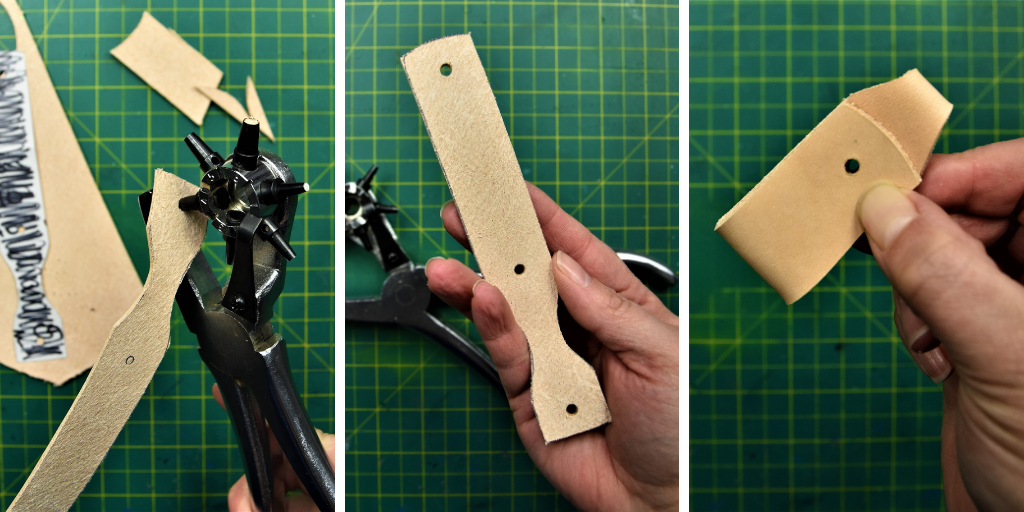
Take your hole punch, and punch out the spaces marked from the template for your hardware. Fold over the leather to ensure that all three holes match up perfectly. If everything looks good, we can move onto setting hardware.
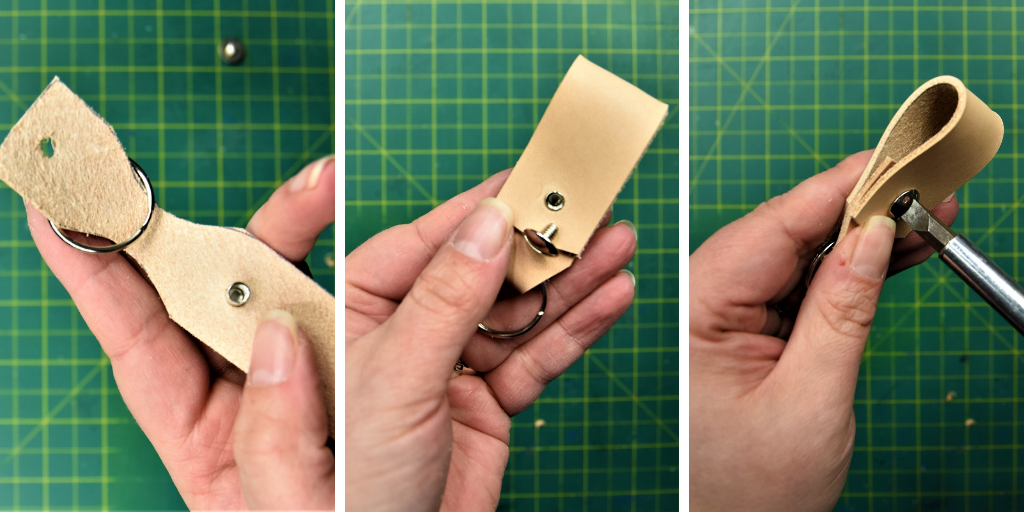
Fold up the bottom end of the leather, and slide it through the center of your split ring. If you forget this step, you can still add the ring after you’ve set the hardware, just be careful not to scratch the leather as you wind it through the ring. The ring should nestle into the curve cuts and stay put.
For the key fob, I used a Chicago screw. It is easily set with a screwdriver and isn’t permanent. If you decided later that you wanted to set this with a rivet or a snap, it can easily be undone!
Fold your leather back over as you did earlier and simply push the barrel of the screw through the three holes at the same time. Once it’s through, take the threaded head of the screw and begin to twist it into the barrel. Use a screwdriver to set it as tight as you can.
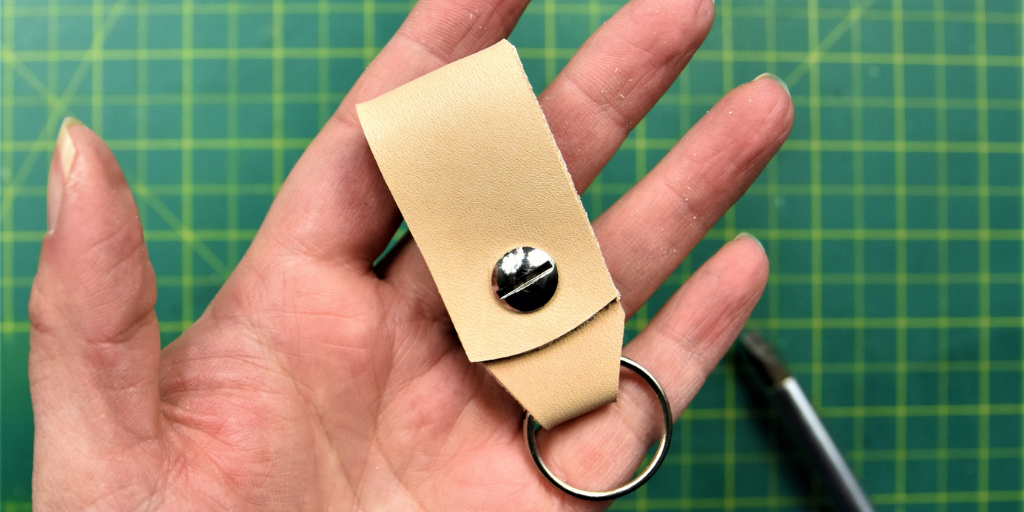
If you like the look of the Chicago screw and want it to be permanent, you can add a little super glue to the threads before you screw the head in and this will lock the pieces together for good.
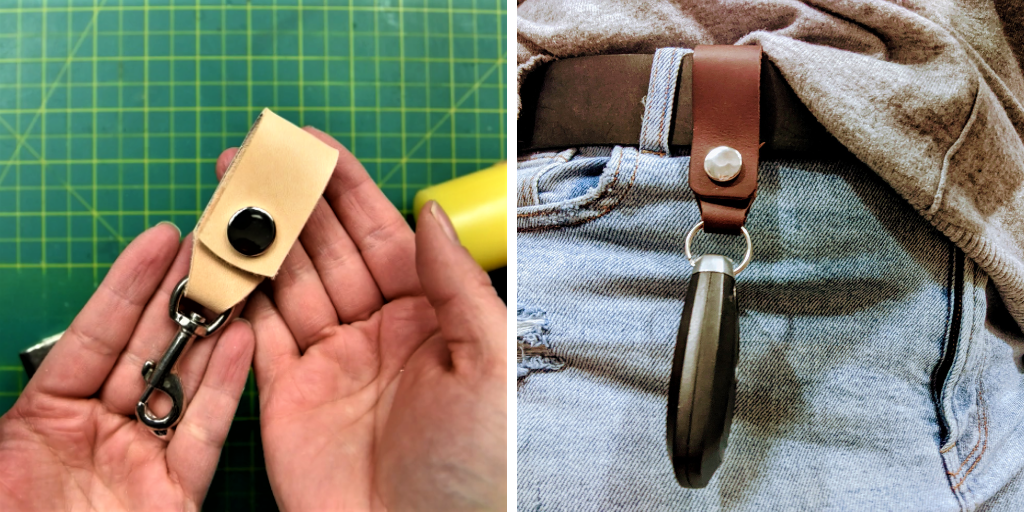
With the screw set, you now have a leather key fob!
Now if you’d prefer to make a key fob that you can attach to a belt, we’ve got a few different steps to take.
Cut out your leather using the longer of the two templates you printed. Use the hole punch to make your holes for your hardware.
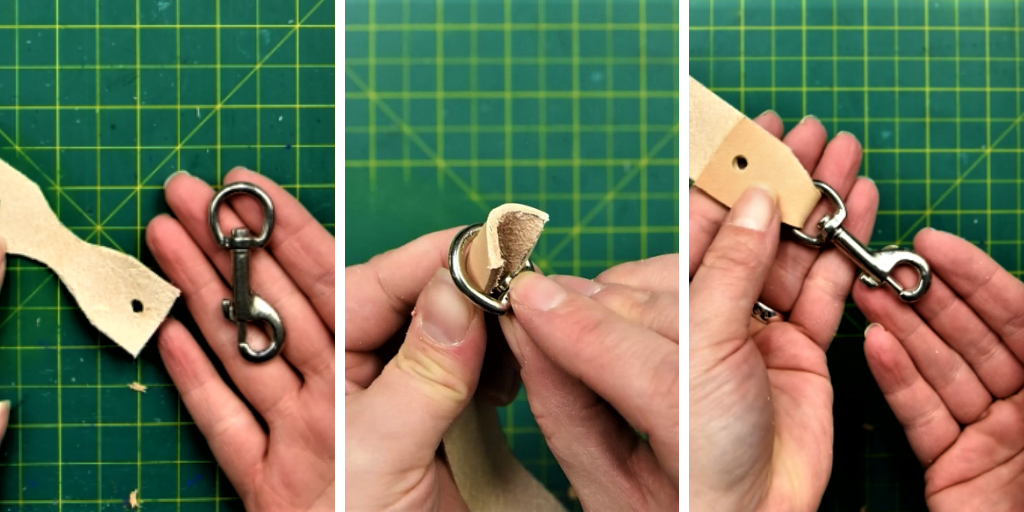
For the belt loop key fob, we are going to add a swivel snap hook, instead of a split ring (though you can certainly use a split ring if you prefer). This hook has a ¾” eye, so the leather has to be folded and worked through, but once it is through, the swivel snap will nestle right into the curved cuts.
Now you will need to start placing your hardware. If you have never set a snap before, please view our YouTube video, showing you the step by step process.
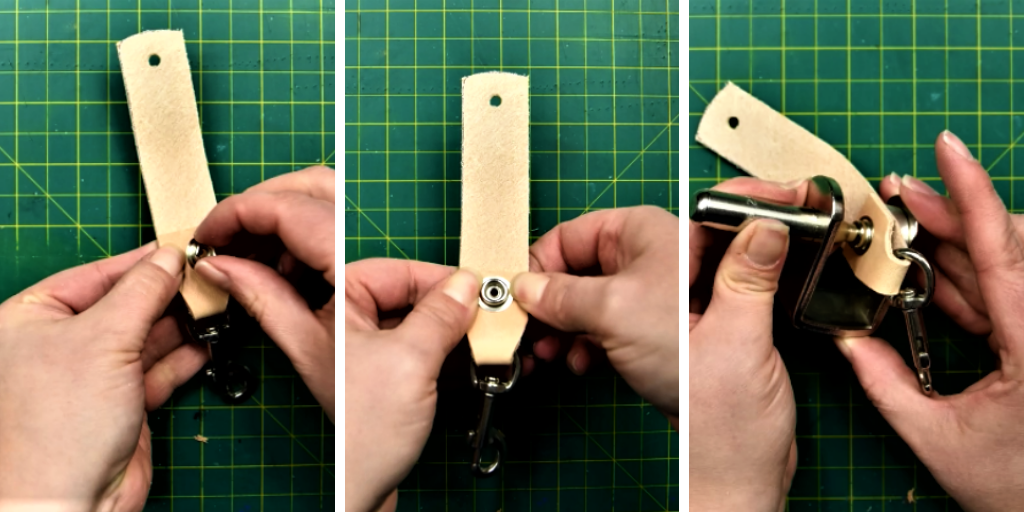
Fold up the bottom of the keychain, over the swivel hook, and line up your two punched holes. Take the eyelet of the snap and work it from the back of the key fob through the two holes, so that the post is completely through the leather.
Then take the stud, and place it over the eyelet post, on top of the leather. Use your snap setter to hammer the eyelet post down and secure the stud in place.
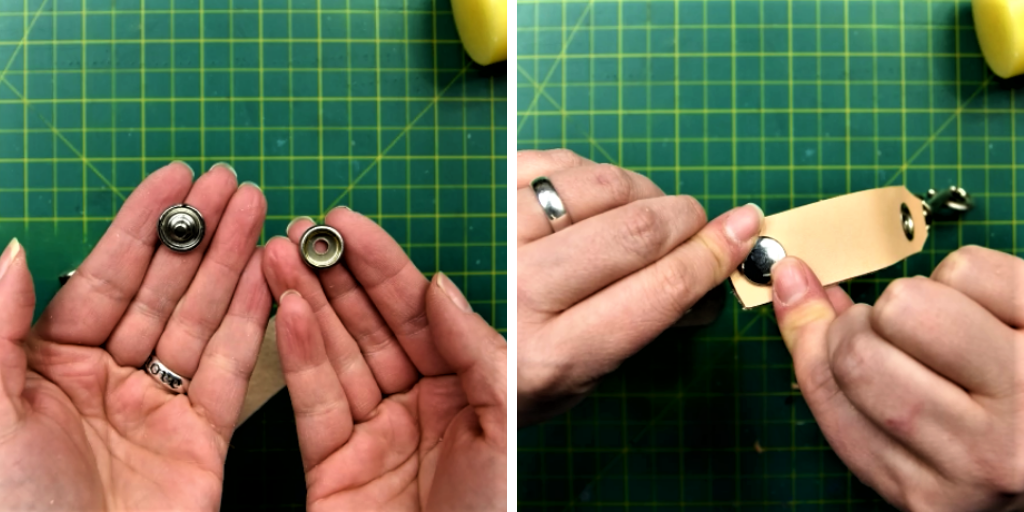
Now you’ll do almost the exact same thing for the snap cap. Place the cap post through the top hole of your keychain, making sure the cap is on the finished side of the leather. If you place it the other way, the snap won’t work.
Take the socket, and place it over the cap post, just as you see it in the photo above. Using the setter (with the concave anvil), again hammer down the post until it has secured the snap socket in place.
Your snap will click together, and you have yourself a finished key fob for a belt. You can simply attach your existing key ring to the swivel snap, and then put your key fob around your belt and snap it shut. Safely within reach, but out of your pockets.
Once you’ve mastered this project, there are several ways to step up the look of the piece. You could bevel the edges for a clean finished look. You could add some designs with stamps or paint. You could hand stitch around the edges for a more professional look.
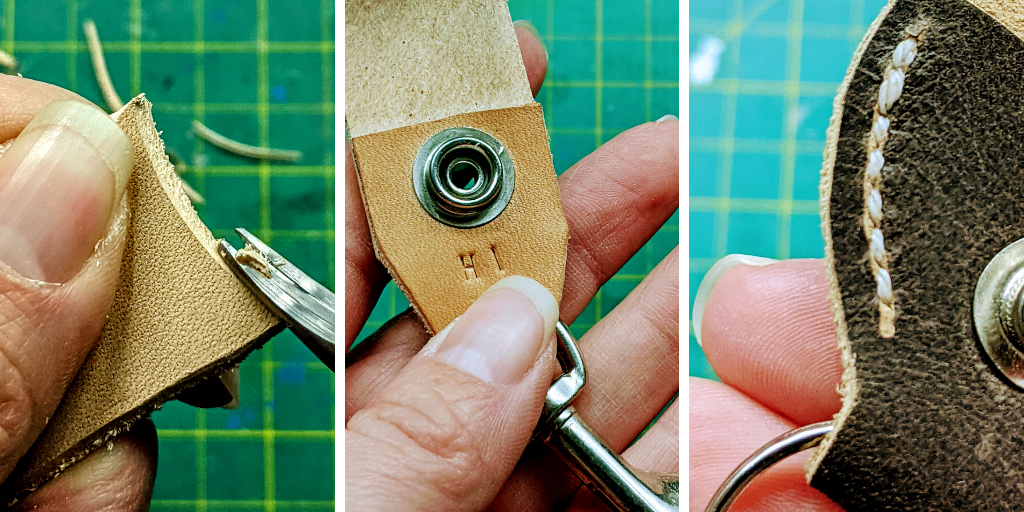
But honestly, with regular use, the edges will round off, the color will patina, and it will garner a lovely finish all on it’s own if you enjoy the simplicity of the design as is!
With these basic skills learned, you can move onto slightly more ambitious leather projects, like leather wallets or camera straps!